If you know me or have followed me at all, you know that I'm more "shabby" than "chic" and although I can appreciate the look of pretty cottage whites it's not something you see and say, "Oh, that looks like something Sherri did"! Since I like to challenge myself, when I saw this little twin bed I decided it wanted to be shades of white. It didn't hurt that I was mentally multi-tasking. My niece is getting married and I'm in charge of "wedding decor". With this in mind, and the fact that my niece is this tiny little thing and will be nesting a new home, I decide she would probably love this little bench with an upholstered seat and lots of vintage lace and cushy pillow; and who knows, if it doesn't sell, it could make a nice house-warming gift. So, join me on this journey as I recycle a twin bed frame with my mind on a wedding!
Step 1: Pull the old 70's maple twin bed out of storage, dust it off and cut the footboard exactly in half.
Step 2: Sand everything. It's easier to do it at this point than wait until the whole thing is assembled. (No photo, but let's face it....it's a sanded bed...not that interesting).
Step 3: Figure out where the sides will attach to the back and pre drill holes. Okay, so I didn't get the best pictures of step three. My brain was a little busy trying to figure out where exactly the footboard halves (my bench sides) were going to attach to the headboard (my bench back). And then there's the table centerpieces for the wedding. My niece likes vintage, shabby chic, eclectic, bird cages, nests, vintage stuff, lace, no flowers, and she doesn't really want them to match. No worries, I've been collecting "stuff" for years knowing that it will come in handing one day; thank God!
Okay, back to the bench. Here was my approach/thought process: Keeping in mind that an average seat height is 18", I laid out the sides against the back to see where I might be able to make an attachment. I made pencil marks where I would pre drill my "Kreg Jig" holes. Then I trimmed the legs to where my seat would actually be about 18" high.
For more information about one of my favorite tools, the Kreg Jig, please refer to my post
"I Built My First Piece Of New Furniture". Here you'll see exactly how it works.
Step 4: Attach the sides to the back of the bench. First, I measure and draw a line on both legs of the
back of the bench where the sides will attach.
Next, apply a little bit of wood glue to the edge of the side piece where it will attach to the back. Then, I like to make a jig from two pieces of scrap wood. One wider piece sits up against the side of the back leg. The second smaller piece sits on top of the back leg just inside of the first scrap. This will give me an offset where the side attaches to the back. I'll use the same jig for the other side and that way my sides will be attached at the same place without having to use a tape measure. I know this sounds complicated, so here's a closeup that might make more sense.
The square piece is the back leg, the piece on the far right is clamped to the outside of the leg, and the smaller piece sits on top of the leg and is clamped to the first piece. That third piece of wood (light color) sticking up behind the clamp is the side that will attach to the back leg. It's clamped to my scrap wood jig.

Once everything is clamped into place, I simply screw into my predrilled holes.
Makes sure to check all sides of the joint and wipe away any excess glue with a damp cloth.....one less thing to sand away later.
Living in an imperfect world, as we all do, #@&*$ happens.
When I attached the screw from the other side, a bit of my turned leg popped off.
This is not the end of the world. Boo boos like this are pretty easy to fix.
A little wood glue and pressure with a craft stick (or recycled popsicle stick) puts the piece back in place.
A little blue painter's tape will hold it in place while it dries over night, or at least for a few hours.
Just make sure to leave this screw out while the little piece dries in place. Tomorrow, I should be able to screw this back in with no problem, "knock on wood".
Step 5: Patching and filling. Being the perfectionist that I am, the unattractive gap between the turned leg and the flat piece of the side will not do! That's a pretty big gap to fill. This gives me a deja vu moment from our remodeling years--"nothing a gallon of caulk can't fill." Sad, but true. We have just finished my workshop remodel and, yes, I was in charge of all the caulking. I remembered I still had a tube in the gun. (Here's a tip: when you have an unfinished tube of caulk, just back off the pressure and stick a nail in the open end of the tube to serve as a cap.)
You'll have to do this in several layers that need to dry overnight. Add a little, smooth it out, let it dry; repeat.
Since I have to wait for this caulk to dry anyway, I decide to start patching and filling other holes that might show in my finished bench.
They make these little wood plugs for the holes made by a Kreg Jig. I decide to use a couple in spots that might show. You simply glue them in. They do sit a little proud of the hole so you just sand them down until smooth.
For the lower holes that aren't going to show, I decided to see how the caulk would work for future reference. I just squirt a little in the hole and then use the craft stick to sweep away the excess. A putty knife would work as well, but why get that dirty when I have a craft stick handy from my earlier repair and I can just throw it away (oops! did I just say that!!!!)
Step 6: While the caulk is drying, I decide to move forward. Since I have the sides attached to the back, I now have my exact measurements and can make the frame for the seat. I've used some scrap wood that I had in the shop. I've measured, cut, glued and screwed the pieces together and to the back and sides.
Step 7: I've decided that I want to upholster the seat of this bench rather than do a wood seat because I envision it being used indoors rather than out. With this in mind, a cheap plywood would be my preferred choice, but I decide that rather than make a trip to the store, I'm going to use whatever I have in the shop. This happens to be a "nice" piece of oak plywood left over from a previous project.
When working alone, I like to use horses and clamps to attach the plywood to the horses both at the point where my finished piece sits, and the fall-off piece sits. That way, I don't have to worry about everything tumbling into a bad accident.
Using a very large "square" tool, I draw the seat on the plywood, make a cut, and move the clamps and horses accordingly.
Okay, so I forgot to take a picture but once the seat is cut, I used a jigsaw to cut the notches where the seat wraps around the legs.
Back to Step 5: Now that the layers of caulk have "almost" filled in the gap...
...I decided to use wood filler for the remainder of the patch so that I can sand the fill to a nice smooth finish.
I know it looks pretty ugly when you're apply wood filler. You're worried you made a mess of this project you've already worked so hard on. But that's the beauty of wood filler versus caulk; caulk is like plastic and you can't sand it, but wood filler is easily sand-able and blend-able.
And now we can FINALLY move on to Step...what is it now...8?
Step 8: Paint. Through all that messy work, my mind is still on the wedding and I'm determined to challenge myself and do shades of white.
I grab the milk paint chart and decide to start with the buttermilk (far left yellow undertone), add a little oyster white (far right blue undertone)...and then see where it goes...
I love doing "antiqued" finishes because you can be sloppy and not really worry too much about coverage.
My handy little blow dryer speeds up the process and I decide to move on to a little crackling using Old Fashioned Milk Paint's Antique Crackle product. Since I only want a little crackle here and there, I don't even bother dirtying a brush, I just use a paper shop towel and wipe it on where I want the crackle.
For my last paint coat, I've decided to use light cream (second from the left on the chart). I also want to illustrate what happens when you don't mix milk paint to a silky smooth texture.
Note: If this is your first visit to my blog, you might want to refer to previous posts for more information about working with milk paint. Check out
How To Build A Bench With A Barn Red Finish for another look at Old Fashioned Milk Paint products being used.

Milk paint comes in powder form that must be mixed with water. Warm water works best because it helps the powder to dissolve. I use an old plastic bowl and wire whisk. It's sort of like mixing pancake batter. If you don't mix it well enough there will be little clumps and the texture will be gritty.
One of the things I like about rustic distressed finishes is that they are very forgiving and there are many ways to achieve them. That's also one of the things I like about milk paint, you can control the texture of the paint which will allow you to give your project more distressing and opportunity for character in the paint finish.
Step 9: Finish Sand. Just use a fine sanding sponge over the whole bench after the last coat of paint and it will smooth out the finish and reveal some of the under-coats of paint. I even like to sand all the way through to the wood on the edges and places that would naturally have more wear and tear. Note: It's important to use a very fine sandpaper or sanding sponge for the final sanding. If you are going to use a darker antiquing for the final sealing process, every blemish will be highlighted including any marks left by sanding.
Step 10: Final Sealing. For those of you who love white, you could stop here and just seal the whole bench with Milk Paint's Clear Coat which will give you a permanent durable finish but will require drying time. Or, you could use a paste wax like Fiddes Supreme in Light (which is actually clear), for a natural looking finish that is fast and doesn't require the drying time but may need to be re-applied in the future. You know, I just can't help myself. I'm struggling here because I love all the texture, crackling, and layers of paint and know that if I wax the bench with Fiddes Supreme in Rugger, all the character will be highlighted even more. So, I decide to test a spot on the back of the bench.

I decide I like the "antiqued" look, big surprise! It's a matter of preferring an ivory wedding dress to a stark white wedding dress. I'm thinking of making an under-skirt for the bench out of an old lace tablecloth; sort of like how a bedskirt would look.
Step 11: Upholstery. I chose a soft natural twill to upholster the seat. Check out my post,
Upholstery 101, for detailed instructions on this type of upholstery job.
Well, at the end of the day, I kept the bench simple and decided not to add a lace skirt.
I was also a little concerned about having a bench with a white seat in the store. I picture little kids climbing all over it and getting the seat dirty before it has sold.
Step 12: Accessorize. Being the fabric junky that I am, I dug through my shelves of fabric and found some pretty reds that looked great with the antiqued white finish on the bench so I made a loose seat pad to protect the seat and a couple of pillows.
Now this looks like something you'd see and say, "That looks like something Sherri made!" A pop of color and it has it's own individual personality.
Funny thing is, when I posted this photo on my Facebook page, the first comment was from my niece saying, "I love this!" She had no idea I was thinking of her the entire time I was working on it.
Unfortunately for her, this cutie sold in one day; except for the pillows which are still available. Guess I'll just have to build another bench for my niece....it could happen...

As for the wedding plans, while digging through all my old lace to see if anything would work for the bench, I found this wide vintage lace and started building centerpieces in my head.

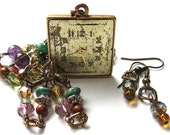
I knew I had some sweet vintage trinkets and small vintage books that would be pretty on a tray. Then, I remembered this amazing photo my husband took for me while he was mowing the field. He had come across a quail's nest in the tall grass and when he uncovered it, the eggs were nested in the shape of a heart! He came inside and grabbed his camera to take this photo for me; like I've said before, he's a treasure. I keep the 8x10 color photo displayed with my nest collection so I just scanned it, shrunk it, and printed it in black and white. I smudged the photo on a sepia ink stamp pad which gave it an "old photo" look and even warped the photo paper a bit to give it an authentic old look. I used an antique gold leaf pen on the edges to make it pretty and I like the black photo corners so I'm thinking of sticking them to a slightly larger piece of card stock so that it looks like a mounted photo.

The whole thing sits on a wreath called a "nest wreath". My niece loved this sample centerpiece so we're off and running with it. One down, 17 more to go....
 Here in California we're praying for rain…..and today it really wants to. It's a little chilly out and the clouds are coming my way…but as you can see the leaves are still on the trees…fingers crossed we'll get a little rain and the trees will figure out its Fall.

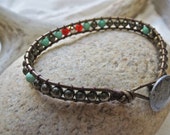
 Once again, I found myself needing something I could work on in the evening while watching a little television…since I thought I was going to stop making neck warmers… I had seen these leather and bead wrap bracelets that I really liked and wanted for myself but I personally didn't want to wear such a big wrap. I liked the idea of being able to mix and match them along with little stretchy bracelets so I started making just single bracelets instead of wraps. Women often stop me and ask me about them, so I started making them to sell and have added a few to the Etsy Shop. I love the look of natural leather and prefer to use semi-precious stones and really nice quality glass beads.


