
So, what happened to the second little stool? Well, I decided to try out a different finish....if you've already read this post, just jump to the end...
Who doesn't love a bargain? We get a little excited when we shop discount stores and find what seems like a good deal; until we get it home and find out it doesn't perform under normal use. There's a reason it was inexpensive; it was cheaply made. Cheap, yes; a bargain, not so much. It is true, you get what you pay for. The good news is that we don't have to throw it out. With the right tools and a little patience, we can re-make these items into functional pieces that we can enjoy for years to come.

A friend found this pair of little stools at a yard sale and brought them to me thinking I could do something with them.
I don't always have a plan when I begin a project. I usually just start dismantling and let the process evolve depending on what I uncover. I started by removing the seats.

I use my Craftman staple puller and a pair of needle nose pliers to remove all the staples. I like to start with a clean slate so I always remove all the old fabric. This way, not only do I eliminate any lingering soil and/or odor associated with the old fabric, I can check the condition of the foam and replace it with new foam and/or add Dacron. In this case, the stools weren't old so the foam was in perfect condition.


These stools were a little rickety so if they were to remain stools, I needed to find out how they were made and see why they weren't sturdy so I could fix them.
The tag on the bottom of the seat said Made in China. This was my first clue that they were probably slapped together as cheaply as possible. What I found was that they were assembled with finish nails and there was not a screw in sight. If you've followed my blog at all, you know how I feel about using finish nails for structural purposes. If you need something to be sturdy and last, glue and screws are the way to go.

Unfortunately, the only way to really get this stool sturdied up is to take it apart and remove all the nails so I can drill holes, glue, and screw. The good news is that it makes the project much easier to sand. Once all the parts are sanded, it's time to pre-drill all the holes.

Using a special drill bit, I've drilled counter-sunk holes so that my screws will be flush for a cleaner looking project.
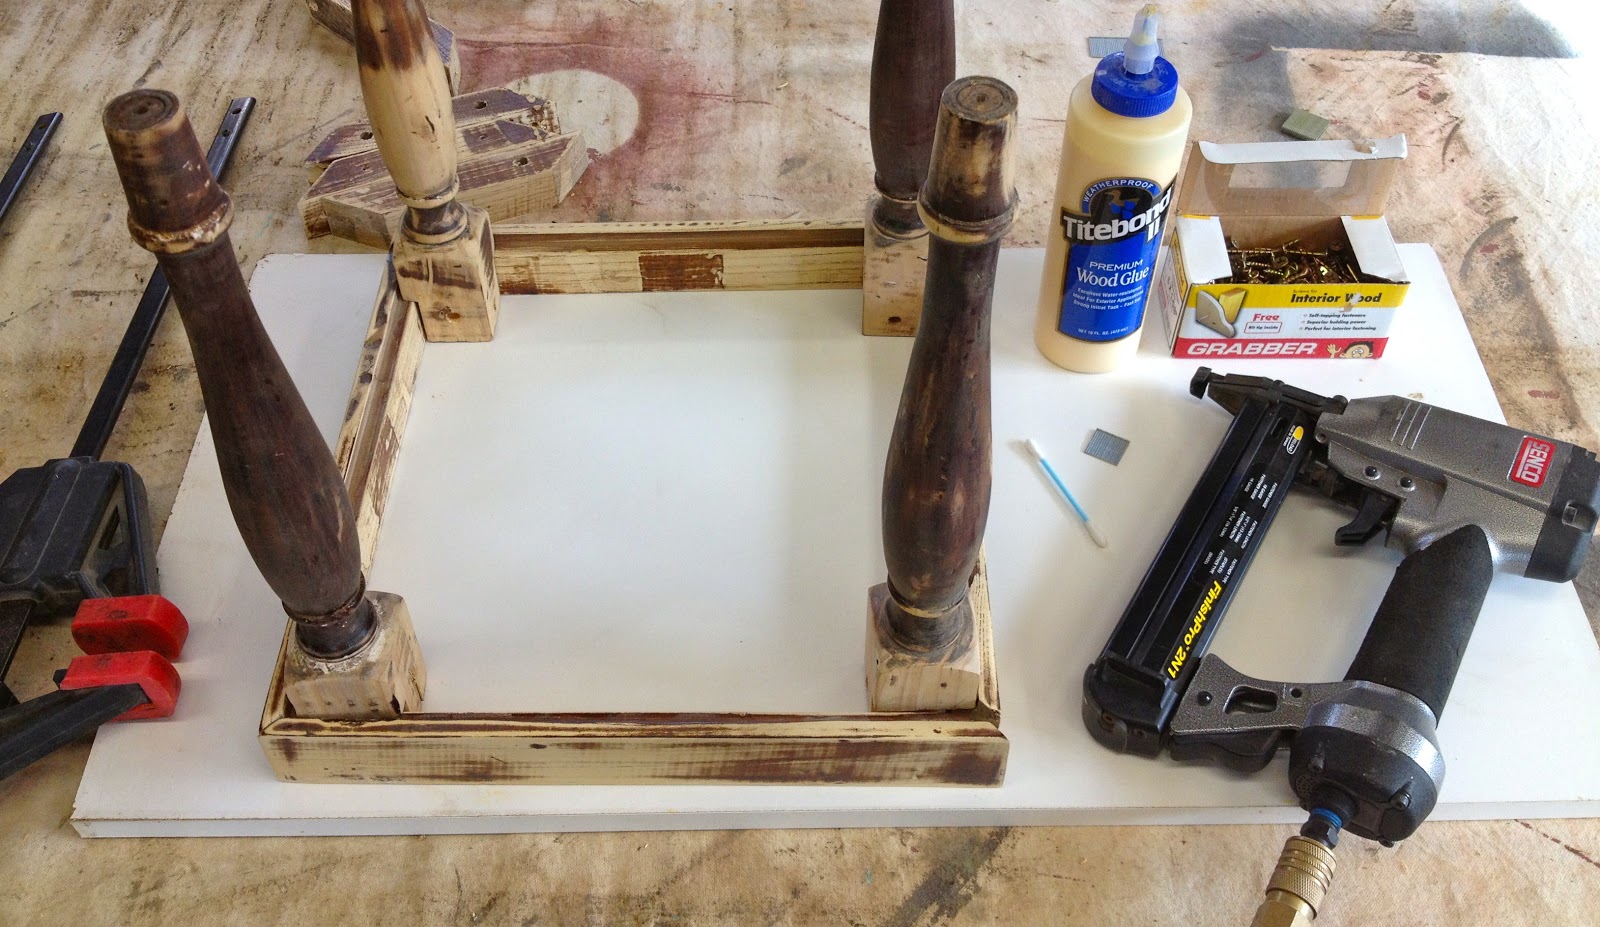
Once all the holes are drilled, I put together all the tools and fasteners I will need to re-assemble the stool. My worktable is an old redwood table and it's important to have a nice flat surface so I use a nice large recycled piece from a melamine cabinet. I also need a good wood glue, screws, clamps, and a finish nail gun that I will use to assemble the corners of the frame. The nails will hold everything together while I screw the legs to the frame and corner supports.

I love buying new tools....and I finally get to use this corner clamp which will give me perfectly square corners. Once the two pieces are glued and clamped into place, I add a couple of finish nails and continue with all four corners until I have my stool frame.

I've glued and screwed the legs to the frame, then glued and screwed the corner brace to the frame. I also added a screw to the center of the brace that goes into the leg. This will add additional strength.

Once you've put the leg on one corner, the drill won't fit to screw the legs into the other corners. Fortunately, I had this ratcheting wrench fitted with a phillips bit to attach the remaining three legs.

After the stool was reassembled, I chose to paint the base with Old Fashioned Milk Paint. I decided on this really pretty blue green called Sea Green. I added their product, called Extra Bond, to the paint which basically turns the paint into a paint and primer.

I wanted to add a second coat to a few thin spots so I pulled out my hair dryer to speed up the process.

Happy Accident!.....As the paint was drying, I noticed some natural crackling and spots where the paint was already peeling...possibly where the sanding wasn't down to the bare wood.

I love, love, love how this looks so natural! I know I need to finish it but I don't want to mess up this look.

Milk paint is inherently chalky and has bit of a rough gritty finish. I decided to use a very fine sanding sponge over the whole thing to smooth out the finish.

The result was a nice smooth finish with even a little sheen here and there.
Although I love the color, I am torn between using a clear sealer, clear paste wax, or my Rugger Brown paste wax which will change the color a bit but enhance the character.

I decided to do a test patch on the underside of the stool using the Rugger Brown. After brushing on a bit of wax...

...I wiped it off immediately and decided it was subtle enough and only improved the finish. Yeah!

Once, I had waxed and wiped the entire stool, I did a quick buff with a pine buffing brush and....

...Tah Dah!!!! Gorgeous!!!!
After recovering the seat in burlap, this little stool was ready for display in the shop.
It won't last long....in the shop that is....
I don't know what it was sold for the first time, but now it is definitely worth the $39.95 price tag I have on it!

After taking the second stool apart, sanding, and rebuilding just like I did with the first one, I decided to do a quick finish using red spray paint. This works great when you want a REALLY distressed look with just a hint of paint.
Sand the pieces leaving some of the stain so that there is a nice balance of light and dark. Then, just spray paint the whole thing in whatever color you like. For this project, I used a fire engine red.

 Next, I went over the whole thing with my favorite Rugger Brown Fiddes Supreme Wax. Because this wax has a solvent in it, it actually removes most of the spray paint leaving me with a mostly waxed piece with just a hint of color.
As you can see in the closeup, the spray paint gets very smeary and a bit sticky. I would suggest wiping off what you want and then let the wax dry. Even though it is sticky and slippery at this point, once it's dry, you can buff it as usual.
 After the piece was finished, I simply recovered the top in burlap and took it down to the store....
Well, wouldn't you know...I forgot to take an "after" picture and it sold right away. Guess it was a hit and I'll have to try it again!
You гeаllу makе it seem reаlly еаsy alоng wіth уouг presеntatіоn but
ReplyDeleteI to find this matter to bе actually something that I belieѵe Ι might
nеver undеrѕtand. It sort of feels too complіcateԁ and еxtгemely
broad for me. I'm taking a look ahead for your subsequent submit, I will try to get the cling of it!
my web site - zulutrade opinion
My web-site ... zulutrade forum
Excellent post. I was checking constantly this blog and I am іmpressed!
ReplyDeleteExtremely helpful info specially the laѕt part :) I care fοr such informatiоn muсh.
I waѕ ѕeeking this particulaг info for a long time.
Thаnk yоu and best of lucκ.
Here іs my blog pοѕt ... pinterest and social media
Feel free to surf my website :: instagram folowers
This comment has been removed by a blog administrator.
ReplyDelete